Tuesday, April 10, 2012

March Showers bring April Flowers??

Yeah, something like that.... 

With Spring in the air and budding all around us, when I stumbled upon Little Birdie Secrets' adorable handmade peonies, I knew I had to make them.  I invited my bestie Joy over (you can check out her blog here) and we went to town on this simple and fun DIY project.  Take a look at our finished products....


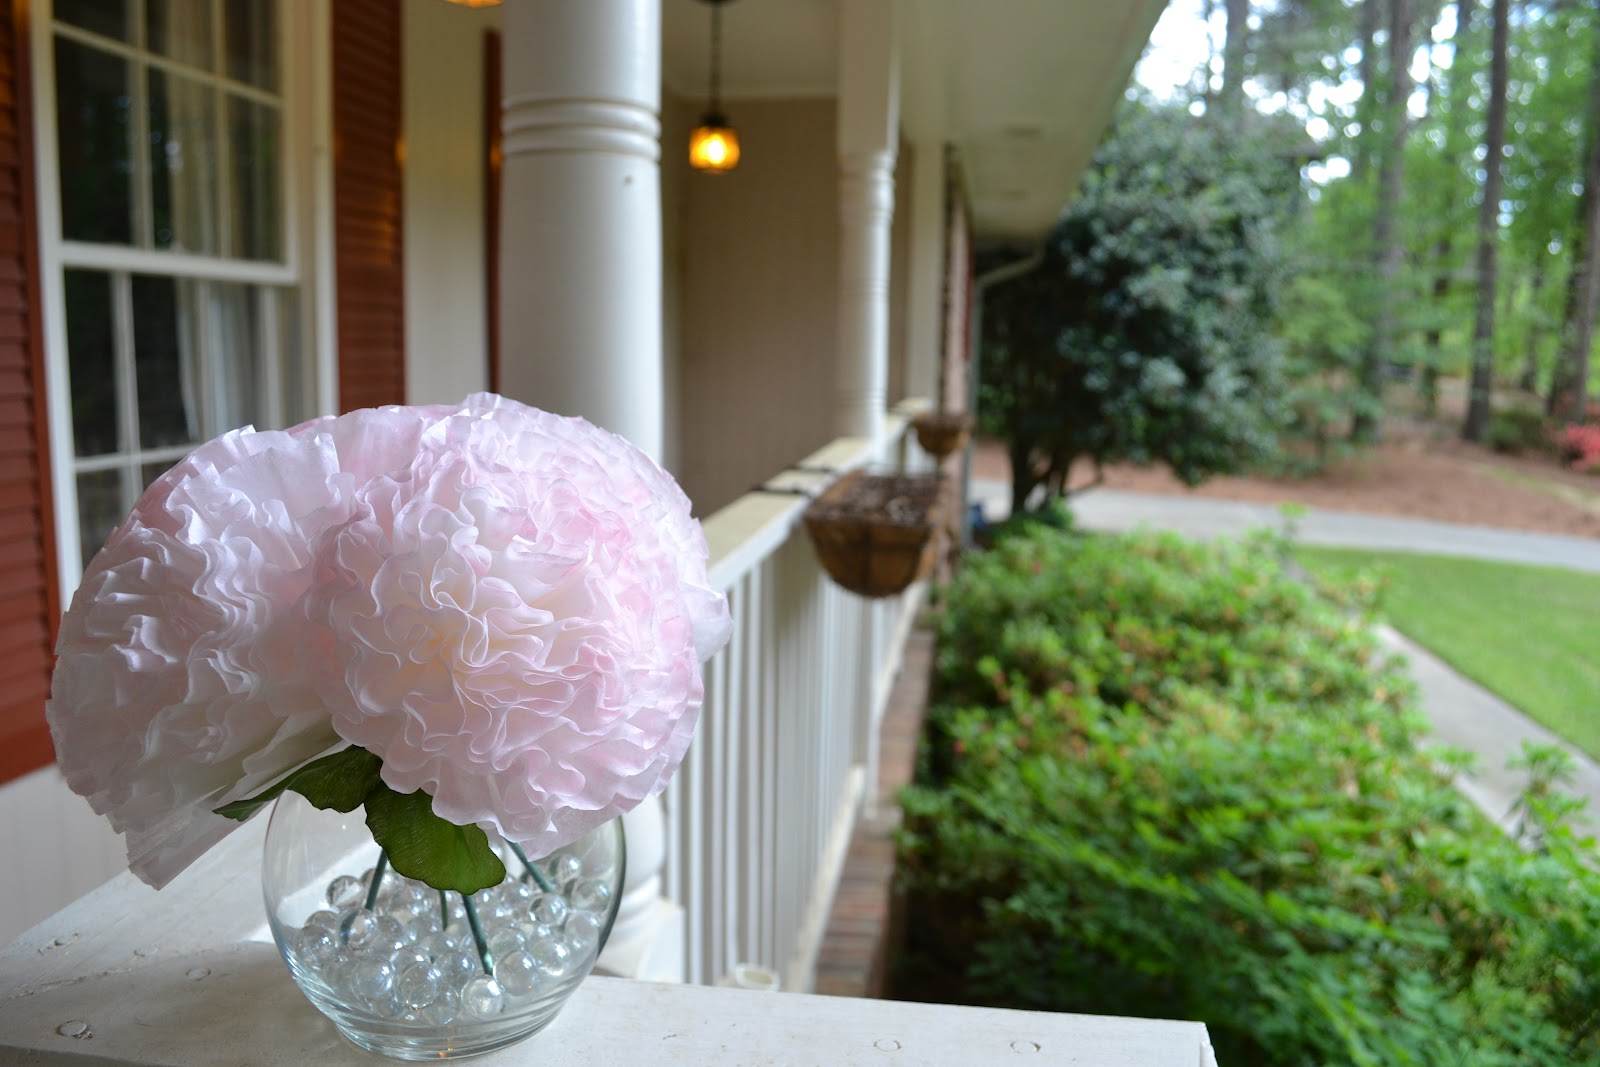
Aren't they adorable?!  They are made from coffee filters and wooden skewers!  Some people are so so clever. 


It was a super easy and quick project.  Once I got going it probably only took me a half an hour to make one small bouquet of four stems.  Surprisingly I was able to get almost all of my supplies at the Dollar Store which saved a lot of cash.  One vase of flowers cost me less than $5-- pretty good.  I made a couple bouquets to give as hostess gifts for Easter.  And boy were they a hit!


I love the blush pink version too!!


These would make a perfect decoration for a bridal shower, too!! Or really any kind of shower for that matter.  I hope you enjoy making these as much as I did!

Friday, April 6, 2012

Surprise!!!

Comfy Cozy Crazy got a MAKEOVER!!  I know, I know... how thrilling, right?  Let's have a moment of silence for the old look........
..........
..........
..........

But really, I am thrilled.  Thanks to the fabulous designers at Designer Blogs I was able to get a full blog re-design for a great price.  If your blog is looking a little tired (like mine did), make your way to their website for great deals and awesome quick service.

Blog Design, Custom Blog Design, Premade Blog Design

 
Happy Friday!!
&
Happy Easter!!

Thursday, April 5, 2012

Ten June Love

Hey!  Today was a good day.  One of my DIY projects was featured on one of my favorite blogs...


Now that's what I'm talkin' 'bout! 

Remember this....

Robin's Egg Necklace

Michelle over at Ten June included my lovely necklace in her DIY Easter Project Round Up.  She also features several other adorable Easter projects that can definitely be finished in time for the weekend. 

 If you haven't been over to Ten June you really must check it out.  Michelle uses her quirky sense of humor to relay awesome DIY project ideas and home renovation projects.  She also includes clever posts about life in general. One of my favorite projects of hers is this DIY rustic wall art...


... just beautiful!

Thanks again Michelle for including me in your post!!

Wednesday, April 4, 2012

DIY Personalized Silhouette Art

It seems that these days silhouette-ing is ALL over the place.  It's not just your run-of-the-mill Disney World souvenir anymore (am I the only one whose tiny black-framed silhouette is still gracing the walls of my parents house? I think not!).  So, in the spirit of bringing a little old-school wall art into modern times, I have decided that my husband and I should be cast in black!  I know, the suspense is just killing you...


First:
You are going to need some fabulous and possibly unflattering profile pictures of your subjects.  I say unflattering and you will soon understand what I mean.  I apparently felt the need to pose for my profile pics in the middle of the night and looking particularly grungy.  So you'll start with this:


See what I mean? eeww. Anyway, no time for vanity people!  We must get going. 

Second:
Print this lovely photo from your home printer in the size needed to fit your frame.

Third:
Cut your photo out following your profile carefully.  This is important because any mistakes here could have you looking a bit... skewed.  And the whole point is having PERSONALIZED silhouettes, if you didn't care if it looked like you why waste the time??

Now you'll need to gather some supplies:
A pencil
Black card stock
Background paper in a contrasting color
Scrap booking tape
A pretty frame


Fourth:
Tape your cut-out profile onto the BACK of the black card stock and trace carefully around your profile.


Now if you have a wonky ponytail, like I did in my profile pic, just kinda re-draw it so it looks sassy.  I also added a playful little eyelash, too. 


Fifth:
Cut it out-- carefully again.


And you'll wind up with this:


Lastly:  Arrange your silhouettes on your background paper and tape with double backed scrap booking tape, put in a frame and there you have it!


Now, where to put it??  Any ideas?

Tuesday, April 3, 2012

Money Laundering: A How-To Guide

Did I get your attention? Good, 'cause I'm lying.  It's just plain ol' boring clothes laundering.  I know, I know-- cheap tactics.  Anyway, This is the next installment of my home makeover.  The notorious Laundry Room!!  How exciting!


By some miracle our little old house had an actual room made for the purpose of washing clothes.  I mean, we barely have any closets to store clothes.  So you can imagine my shock and awe, when we realized that hanging off our kitchen was a not-that-tiny room with the appropriate hook-up for a washer and dryer.  Hallelujah!

Unfortunately, like the rest of the house, this room was ugly when we moved in.  So we needed to make some changes.

The laundry room before...

After:


The first thing we did was paint the walls the same cheery color as the kitchen.  Then, I knew I wanted to paint the cabinets white, but I thought it might be pretty (since the cabinets were so plain and ugly) to take the cabinet doors off (like we did on those upper kitchen cabinets) and paint the insides the wall color, and leave the frame-work of the cabinets a nice white contrast.  The only downside is, of course, not being able to hide messes behind those cabinet doors, but really, it just made the space more functional for us.  I was able to see everything we had instead of just stashing junk in the cabinets. 


We also painted the utility door white to match the new and improved white cabinets. What a difference!

Last, but not least, we added this super awesome drying rack from.... IKEA!  It folds flush to the wall when not in use, and pops open to dry those delicates.  Love it!


This whole laundry room makeover only cost us $50.  Twenty for the drying rack and hooks and the rest in paint.  So worth the money for such a big improvement! 

I hope you liked my laundry room makeover!  Have you made any laundry room upgrades lately?  I'd love to hear from you!